Monday, March 30, 2015

I FROGot! Card (Kitty Bee Designs Spotlight)

Hi everyone :-D 

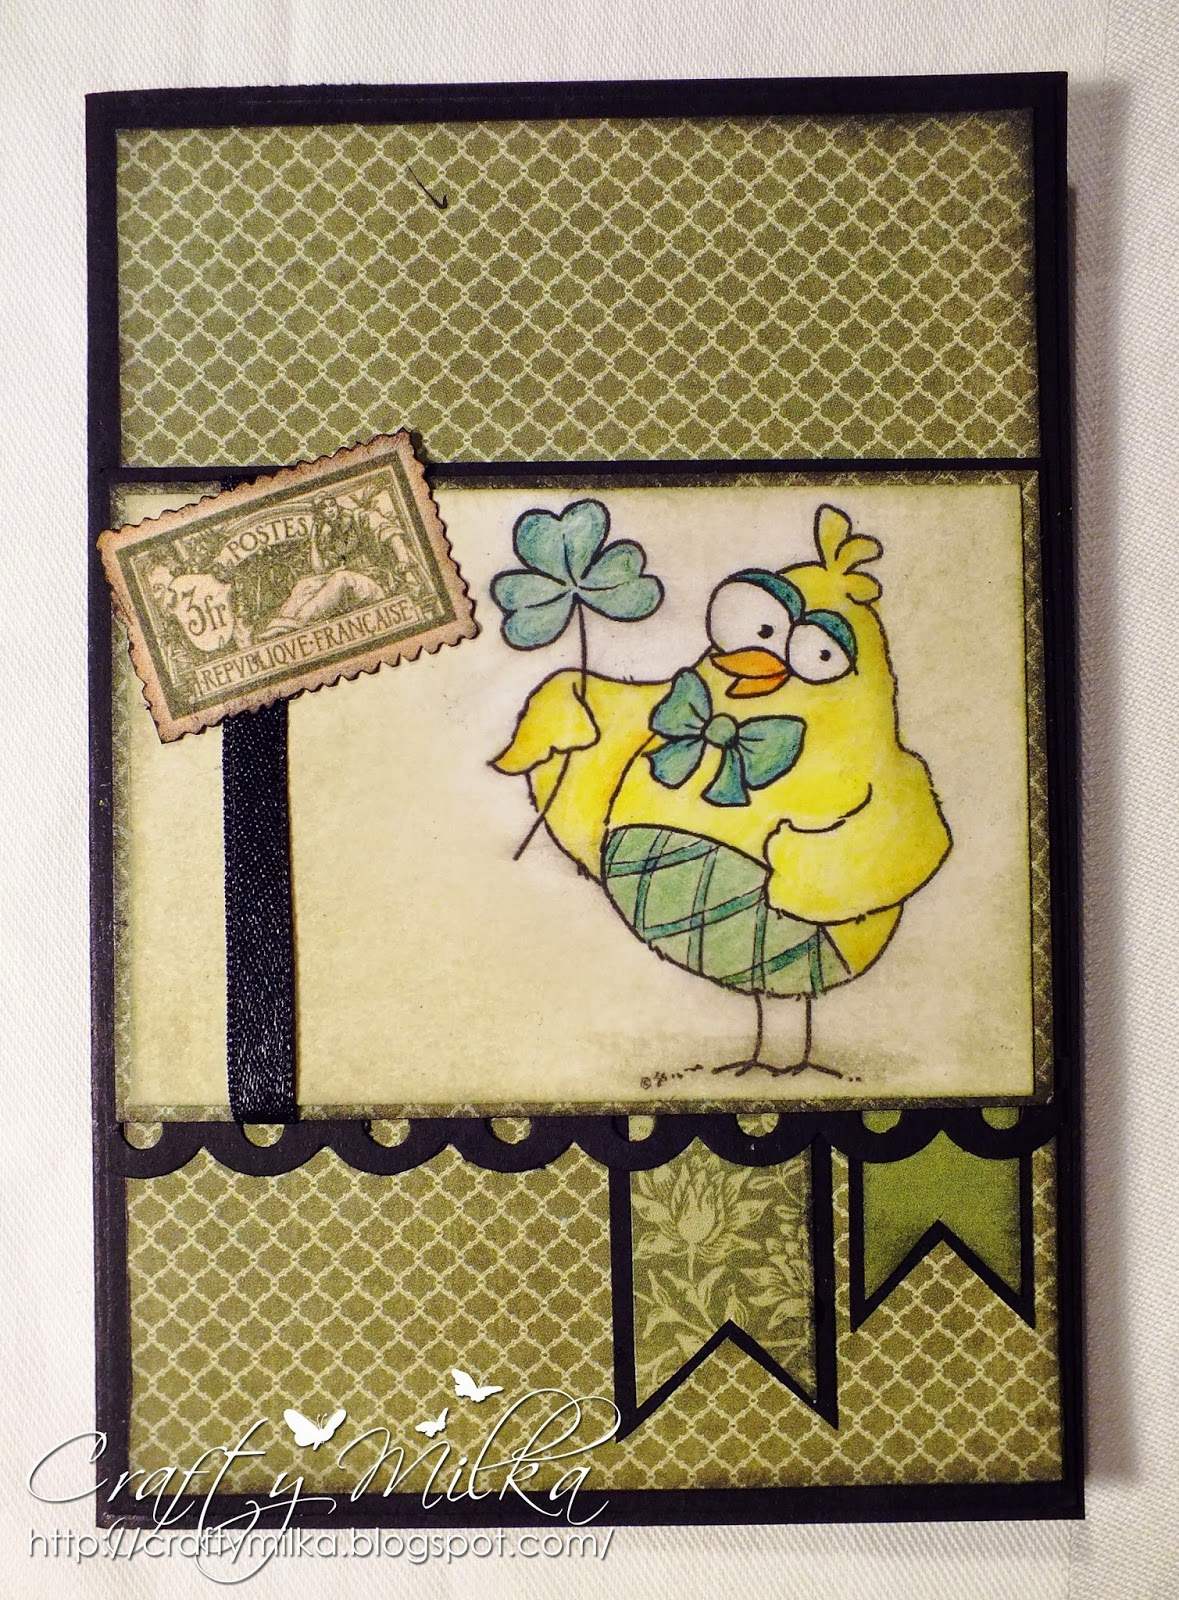
Today it´s my turn to be on the spotlight over at Kitty Bee Designs and I made this I FROGot! Card


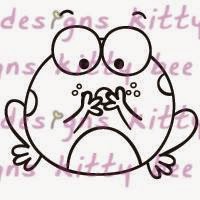
I used super cute image 'OH I Forgot Froggie' from 2013 Good Luck Froggies Release. I like all froggies from the release and I think I´ll use them all in my future projects. :-D 


"Frogs are symbols of prosperity, wealth, friendship, and abundance in many cultures. In other cultures they symbolize fertility. In the Native American culture of the Southwestern United States, the frog carries a piece of wood in its mouth because the Mojave people believe frogs brought fire to humans. For the ancient Romans, the frog was believed to bring good luck to one's home. Native Aborigines of Australia believe that frogs brought the thunder and rain. Frogs are said to be effective in speeding up recovery from disease. Among the ancient Egyptians and Greeks, frogs symbolized inspiration and fertility. In ancient Egypt, Hekt, the frog goddess, protected newborn babies, hence frogs were symbols of fertility and birth. The frog is also said to attract true friends and to help find long-lasting love."


Details about my card... 

Image is paper pieced
I printed four froggies, two on a white cardstock paper and two on green cardstock paper, colored and shaded parts I needed with colored pencils, fussy cut all parts, colored edges with black permanent pen and glued all pieces together. Then I added gloss resin gel on froggie´s dots and belly, to create glossy accents.

Sentiment callout (bubble) is also paper pieced.  
I made sentiment callout using 'Stays In The Cave' free font from Kevin&Amanda and Paty Greif 'Circus Fun Bubbles' (bubble 23). I played with words and changed forgot to a FROGot. :-D 
I printed one bubble on the white cardstock  paper and one on the green cardstock paper, fussy cut them, colored edges and glued them together.

Here is a photo of all pieces I used for paper piecing. 

I love dimension on my cards! I added 3-D foams behind image and sentiment and placed them on the card. 

Card dimensions are 101 mm x 146 mm (4" x 5 3/4").

List of supplies:


I hope you enjoyed my spotlight project for this month. Check out the Kitty Bee Designs Etsy Store, Kitty Bee Designs Blog and Kitty Bee Designs FB. Be prepared for super cuteness! :-D 
http://kittybeedesigns.blogspot.com/


I am entering my card to following challenges:
Note: bold text and challenge badge (if any) are direct links to the current challenge and blog badge (if any) is direct link to blog or challenge home page.

1) Cards und More, Challenge #128: Monochrom (Monochrome)
http://cardsundmore-challengeblog.blogspot.com/

2) Country View Challenges, March - Anything Goes
http://countryviewchallenges.blogspot.com/2015/03/its-march-and-were-celebrating-our-2nd.html
http://countryviewchallenges.blogspot.com/
Happy 2nd Blogaversary! :o) 

3) djkardkreations, NBUS (never before used schtuff) #4 - Anything Goes
My NBUS are Kitty Bee Designs 'OH I Forgot Froggie' digital stamp and Paty Greif 'Circus Fun Bubbles', bubble 23.

This is my 2nd entry to this challenge. 
http://www.djkardkreations.com/p/prior-nbus-challenges.html

4) Simon Says Stamp Wednesday Challenge, Anything Goes
This is my 2nd entry to this challenge. 
http://www.simonsaysstampblog.com/wednesdaychallenge/


Thank you for stopping by and your kind feedback. Enjoy and smile! :-D


Crafty Milka

Friday, March 27, 2015

Bunnies and Butterflies Card (KBD Aloha Friday Challenge #44)

Hi everyone :-D 

My second post today...

Today a new Aloha Friday Challenge starts at Kitty Bee Designs.
http://kittybeedesigns.blogspot.com/

New challenge for this fortnight is #44 - Easter.

Our sponsor for this challenge is Dilly Beans Digi Stamps, with an awesome prize for our random winner: 3 digital images.
http://www.sillydillybeans.blogspot.com/


For this challenge I made this Bunnies and Butterflies Card, using our sponsor's beautiful image 'Aidynn's Bunny Framed' .


First I printed the image on a white paper (160 grams) and colored it with colored pencils.

When I color with colored pencils, I mostly blend colors using only pencils or using white pencil, but this time I tried something different. I blended colors with baby oil. I saw that in a video Colored Pencil Blending Methods by Dina Kowal a while ago. I am satisfied with the results.

While blending with baby oil, I smeared the image's background, so I decided to paper piece the image. I fussy cut the colored image, colored edges with black permanent pen, printed another image on pink paper (120 grams) and glued fussy cut piece over it. I didn't take photos of these.

I printed large polka dots digital paper and small polka dots black and white digital paper on the pink paper. I found those free digital papers a while ago, but, unfortunately, I can't find where.

After I put all pieces of the card together, I added gloss resin gel on some parts of the image and covered butterflies with it, to create glossy accents. This is a new product I bought few days ago and it makes the same effect like a transparent glossy varnish that I used in my previous projects. Glossy effect is great and a 100 ml bottle didn't cost a lot. It was on sale, so it was great opportunity to grab something new and try it. I am very satisfied!

Card dimensions are 89 mm x 132 mm (3 1/2" x 5 1/4").

List of supplies: 
    http://www.sillydillybeans.blogspot.com/2014/01/595-aidynns-bunny-framed-350.html
  • Dilly Beans Digi Stamps 'Aidynn's Bunny Framed'
  • large polka dots digital paper 
  • small polka dots digital paper 
  • Florence cardstock paper, Canvas Texture (dark and light grey)
  • white paper (160 grams) 
  • pink paper (120 grams) 
  • colored pencils (skin color, pink,light and dark grey)
  • Staedtler Lumocolor permanent black pen S (superfine) 0.4 mm 
  • Staedtler Lumocolor permanent black pen M (medium) 1.0 mm 
  • fine liners 0.5 mm (pink, grey)  
  • Pritt universal glue 
  • white water based glue 
  • gloss resin gel super-clear  
  • printer
  • scoring board 
  • trimmer
  • scissors 
  • crafting needle 
  • butterfly paper puncher 
  • Johnson's baby oil with Aloe Vera
  • cotton buds

Stop by the Kitty Bee Designs blog and check out lovely projects my Design Team mates created. And don´t forget to join us in this challenge. We are looking forward to see your projects. :-D


I am entering my card to following challenges:
Note: bold text is a direct link to the current challenge and blog badge is a direct link to blog or challenge home page.

1) Creative Card Crew, Challenge #83 - Easter Critters 
http://creativecardcrew.blogspot.com/

2) Crafts 4 Eternity Recipe Challenge, R#219 - Easter
http://crafts4eternity.blogspot.com/

3) djkardkreations, NBUS (never before used schtuff) #4 - Anything Goes
My NBUS is Dilly Beans Digi Stamps 'Aidynn´s Bunny Framed' digital stamp.
This is my 1st entry to this challenge. 
http://www.djkardkreations.com/p/prior-nbus-challenges.html

4) Simon Says Stamp Wednesday Challenge, Anything Goes
http://www.simonsaysstampblog.com/wednesdaychallenge/


Thank you so much for stopping by and your kind feedback. Enjoy and smile! :-D


Crafty Milka

Colorful Kitties Set (Fairy Tale Challenge #114 + Blog Hop)

Happy Friday everyone :o)

It´s time for a new challenge at Fairy Tale Challenge Blog.

Theme for this fortnight is #114, Bunt / Colorful. We want to see colors, colors and more colors on your projects. :o) 

Our sponsor for this challenge is Görlach GmbH, with a fabulous prize for one lucky winner, a set of high quality crystal beads, pearls and gems.
http://www.goerlach-gmbh.com/en

Isn't the prize GORGEOUS? But that´s not all. We also have a Blog Hop and on every stop a little candy for one lucky winner. Here is the blog hop list:


For this challenge/blog hop, I made a Colorful Kitties Set, which includes a card, mini cards set in a box with a matching envelopes, post it note holder and two decorated paper clips. 


Here are few details about this set.

Card
I used super cute Bugaboo digital stamp 'Critter Balloons - cat'. I got this cutie for free, as a Friday freebie at Bugaboo
Image is paper pieced and it has 3 layers. 
I printed one image on digital patterned paper. This was my card panel.  
I printed two more images on white cardstock paper, colored them, fussy cut them, colored edges with black pen and glued all pieces together. I covered balloon, cloud, cats´s muzzle, splats and heart with gloss resin gel to create glossy accents. This is a new product I bought few days ago and it makes the same effect like a transparent glossy varnish I used in my previous projects. Glossy effect is great and a 100 ml bottle didn't cost a lot. It was on sale, so it was great opportunity to grab something new and try it. I am very satisfied! :o)
Card dimensions are 89 mm x 126 mm (3 1/2" x 5").  

List of supplies (card):
  • Bugaboo digital stamp 'Critter Balloons - cat'
  • Prettygrafikdesign digital paper (stars) 
  • white cardstock paper
  • colored pencils (pink, light and dark grey)
  • Koh-i-noor woodless colored pencil (Chrome Yellow 1)
  • Koh-i-noor universal pencil for writing on gloss surfaces
  • Staedtler Lumocolor permanent black pen F (fine) 0.6 mm
  • Staedtler Lumocolor permanent black pen M (medium) 1.0 mm
  • Pritt universal glue 
  • white water based glue
  • gloss resin gel super-clear 
  • printer 
  • scoring board 
  • trimmer
  • scissors 
  • crafting needle 


List of supplies (mini cards set, post it note holder, decorated paper clips):
  • Prettygrafikdesign digital paper (stars) 
  • white cardstock paper
  • post it block 3" x 3"  
  • 2 paper clips
  • 2 magnets
  • Pritt universal glue
  • printer
  • scoring board
  • trimmer
  • round corner paper puncher
  • cat paper puncher 
  • EK Success 1" scallop circle punch 


This whole set is my blog candy for one lucky winner. I hope you like it. For your chance to win it, you just need to leave me a comment on this blog post until April 9th. Easy peasy! :o) 

All our lucky winners, challenge and blog candy winners, will be announced on Fairy Tale Challenge Blog on April 10th, before our new challenge starts. :o) 
 
Now hop over to Andrea´s blog and see a lovely project she made for this challenge and her blog hop candy. And don´t forget to join us in our challenge. We can´t wait to see your projects. :o) 

Thank you for stopping by and your kind feedback. Good luck to everyone! :o)
  
 
Crafty Milka

P.S. Stop by latter today, I´ll be posting again. 

Thursday, March 26, 2015

Celebrating 30 days of Pisces 2015 Wrap Up Post

Hi everyone :-D

I finally managed to find some time to write this post. Spring arrived and I am busy like a little bee, flying here and there, doing zillion things. :-D

I am Pisces and I decided to celebrate whole period in a crafty way. Pisces period started this year on February 19th at 12:45 AM and ended on March 20th at 11:45 PM. (These time values are for Cavtat, Croatia.) 

I called my celebration Celebrating 30 days of Pisces. I gave myself 4 challenges and tried to complete them in 30 days, which I did.

These were my challenges:
  1. make at least one card every day and post it here on my blog (this excludes DT cards)
  2. make 5 CASE cards or more (my own or from other designers)
  3. make at least 2 projects using techniques/medium never used before (this excludes DT projects)
  4. finish crochet project 
_______________________________________________________________________________________

Challenge #1: One card every day

This was a big and very exciting challenge for me, because I usually don´t make cards every day, neither I write posts every day. I had some technical problems at the beginning, so I decided to extend this challenge for one day.

I made 32 cards, excluding DT cards.

I made a preview of all cards on my Celebrating 30 days of Pisces 2015 page, so I won´t list all of them here again. But I do want to share (again) my cards that were Honorable mentioned or TOP 3. I am so honored and happy for these recognitions! :-D


http://challengeupyourlife.blogspot.com/2015/03/challenge-9-winner-top-3.html#.VRRmko6rH-s
Paper Smooches SPARKS Featured Player


http://addictedtocas.blogspot.com/2015/03/winners_17.html


Making cards in this period, I realized I am crazy about CAS, mini cards and black/yellow/white color combination. :-D It´s fun how you discover new things about yourself every day. :-D
_______________________________________________________________________________________

Challenge #2: Make 5 CASE Cards or more

CASEing cards was my second challenge. I had so much fun CASEing, because I usually don´t CASE. :-D

I made 7 CASE cards.

I made a preview of all cards on my Celebrating 30 days of Pisces 2015 page, so I won´t list all of them here again.

 _______________________________________________________________________________________

Challenge #3: 2 New Techniques/Mediums

This was also a fun challenge. Trying new techniques or using new mediums is always so exciting.

Just from curiosity, I tried to color with colored pencils on a distressed paper. Results were great! It´s like coloring on a Kraft paper, also something new I tried for my DT project.
http://craftymilka.blogspot.com/2015/03/lucky-card.html

Before this challenge, I never build a scene with stamps using stamping and masking technique. It was a time for me to try this, because so many of you are doing that and I looooove it! :-D This mini card was a result and I was very satisfied with it. :-D
http://craftymilka.blogspot.com/2015/03/amanitas-mini-card.html

_______________________________________________________________________________________

Challenge #4: Crochet Project

I started a crochet project (crocheted hippopotamus) on February 5th and finished it on March 20th, just a couple of hours before Spring arrived. In the last minutes of my celebration. 

Pattern I used for crocheting is a design from super talented lady, hiding behind the name Heidi Bears. I fell in love in this super cute Happypotamus when I saw it and purchased a pattern immediately. 

This one was my third hippo and I made it for my niece Tea who is 4,5 years old. I named hippo after her, Happypotamus Tea


For more photos just follow this link

I must admit, if I didn't challenge myself to finish this one, I would probably still working on it. So I find this challenge extremely good, as well as Tea. :-D 

_______________________________________________________________________________________

That would be all. I wrapped up all 30 days (well 31). I had so much fun and I hope I˙ll manage to repeat it next year. 

I would like to thank you all for visiting and leaving me comments through my celebration period, and also to apologize that I didn't comment on your blogs so much as I usually do. I did visit you all, my dear friends, but I just didn't have enough time to comment on everything and to keep up with my challenges. I know you all understand. :-D

Big hugs to all and thank you for visiting today. Enjoy and smile! :-D 


Crafty Milka 

Saturday, March 21, 2015

Happypotamus Tea

Hi everyone :-D

My second post today...

I want to share with you a crochet Happypotamus Tea.


I started making this one on  February 5th and finished it yesterday, March 20th, before spring started. This is the 3rd crochet Happypotamus I made and I made it for my niece Tea, who is 4.5 years old. 


This beautiful pattern is a design from Heidi Bears. I fell in love in this super cute Happypotamus when I saw it! 

Measurements: 
  • 10 cm high  
  • 9.5 cm width 
  • 21 cm long 
  • Weight: 254 grams

List of supplies:
  • Happypotamus The Happy Hippo Crochet Pattern by Heidi Bears
  • 100% cotton crochet embroidery thread (TULIPAN no. 15, white) 
  • 100% cotton crochet embroidery thread (lavender) 
  • polyester non-allergic stuffing for toys and pillows 
  • black safety eyes Ø 9 mm (2 pieces) 
  • fine steel crochet hook 1.00 mm
  • fine steel crochet hook 0.65 mm
  • large hand sewing needle 
  • scissors

As a member of Ravelry community, I kept notes about my project in my Ravelry Notebook, here


I am entering my project to the challenge:
Note: bold text is a direct link to the current challenge and blog badge is direct link to blog home page. 

Craft my Life, All Crafts Challenge February/March
http://sparklingblackrose-craftmylife.blogspot.com/


More photos... Tea and L´Oranž


Thank you for stopping by and your kind  feedback. Enjoy and smile :o)


Crafty Milka
Related Posts Plugin for WordPress, Blogger...